Tuesday, December 27, 2011

Dragon Age Origins: Playing Every Character Background


Dragon Age: Origins Playing Every Character Background, Changing Character Backgrounds

This is one of our Dragon Age: Origins walkthrough / cheats / mods posts. In this post, we will cover playing multiple character backgrounds with the same character, and changing your race/background with the console.

How to Change Your Character Background in-game in Dragon Age Origins

Download GQ Change Background Scripts.

Installation: Put all files in Override folder. There is a text file with instructions, NSS files (text files with the script code), and NCS files (compiled script files). You really only need the NCS files. The text file and NSS files are for reference only.

Usage example: To change to Dwarf Noble,
1. Select main character
2. Enter console command "runscript gq_race_dwarf"
3. Enter console command "runscript gq_background_noble"

NOT tested in every interaction involving race and background -- use at your own risk.
NOT tested in a game where the appropriate background story was not played through.
  • You must run the background script last so that the appropriate flags can be set in the game. Without doing this, the game scripts may not detect your race and/or background correctly.
  • You should play through the appropriate origin story as certain choices you make there are recorded for future reference. See below on how to do this.
  • If you are a mage, the game seems to check for main character class instead of origin, and sometimes you will get mage background options and responses in dialogue.
  • Sometimes the Dwarf Noble origin still won't register you as a Dwarf. Try switching to a Dwarf Commoner. An example of where this happens is when speaking with Sarel in the Brecilian Dalish Camp.
How to Play Every Character Background

These mods, or something similar, are required/recommended:


When you start a new game, you play through an origin story and end up recruited by Duncan and brought to Ostagar to start the campaign. In order to set the plot flags for the various backgrounds, you should play through all origin stories so that when you select a race/background combination in-game, you will have the appropriate history in case the script checks to see what choice you made during your origin story.
  • For example, suppose you didn't play the Dwarven Noble story. And during the game, you used the console to play a Dwarven Noble background. You talk to someone in Orzammar and the script checks to see if you personally killed Trian or not. There might be a default choice programmed if you are lucky; in the worst case, it could corrupt your save game or crash Dragon Age.
So, at the start of the game, play through one of the backgrounds. At this point, it doesn't matter how you play through them. Using the All Origins mod, you can choose any race and class to use. If you are not using it, you will need to choose the race/class you ultimately want to play, and play it LAST. For example, if you want to play a mage, you must do the Circle Mage origin last since you can't do each origin story more than once, and the final one will determine the character you are left with to start the campaign at Ostagar.

After playing through one of the origin stories, you will end up at Ostagar. DON'T do anything here yet. There is no storage, so you will need to write down the items you want to retain from game to game, and use either Add Any Item Visual Deluxe or Additem Script to create them later. Gold is retained from game to game, so sell anything you don't want to the Quartermaster.

To play the next origin story, use the console command runscript chargen. This will take you back to the character creation menu. Choose another origin story. You can change your gender, race, and class here if you like. You will not be allowed to change your appearance. If you select a different first name, the game will start a new savegame folder for that name. This is apparently harmless, but it can be bothersome later. I recommend just using the same name.

When you start the next origin story, save the game and reload it to refresh the character's appearance based on your new inventory -- which is cleared and reset, except for the cash you have. If you changed your gender and/or race, your appearance will be messed up. For example, if you were a human and now a dwarf, you will have a human head floating over a dwarf body. Use the Change Your Hero Hair and Face utility to fix this.

Repeat the steps above until you have played through all the origin stories. Once you've finished, if you want to redo your character, you can use Respecification DAO and Change Your Hero Hair and Face again. You can now proceed to play through the rest of Dragon Age Origins.

This procedure has NOT been thoroughly tested in terms of how the game scripts may react, so use at your own risk.
In some cases, it will not apparently be possible to trigger certain background options. For example, we played a male Mage, and it was impossible to marry Anora even if she recognizes the human Noble background and has dialogue acknowledging the Warden as the Cousland heir. Even by changing race and background, and by using the console to remove the Mage class and replacing it with the Warrior class, it was not possible to get a dialogue option for Anora to consider marriage -- she says a mage on the throne is impossible.

Friday, December 16, 2011

Rogue Role Models for Kids in Harry Potter Games?


In this YouTube, around time 2:32, Harry Potter and friends come across some locked chests on their train ride to Hogwarts. Never mind who they belong to -- Let's loot it!

In most RPGs, you typically have to be a thief or rogue, or explicitly take some kind of lockpicking skill -- thereby making a conscious decision to learn and/or invest in thievery. But with magic, you can loot things just because you have the power. Might makes right?

Wednesday, November 2, 2011

Game Review: Drawn: Trail of Shadows


Game Review - Drawn: Trail of Shadows

Score +7/-1

Overview
Drawn: Trail of Shadows is a hidden object game and puzzle game set in the same world as the earlier Drawn games, The Painted Tower and Dark Flight. In the second game, the princess Iris is restored to the throne, so in many ways that story arc has ended. Trail of Shadows rewinds the clock to the action preceding the events in The Painted Tower.

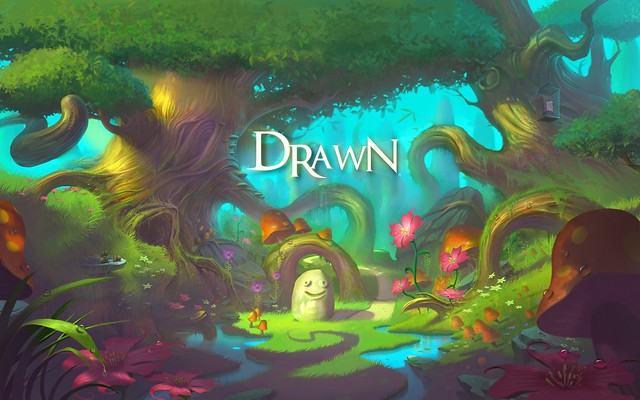
+ It's a very beautiful game. Trail of Shadows continues the gorgeous artwork, and keeps the overall painted-scene fairy-tale storybook style that is very colourful.
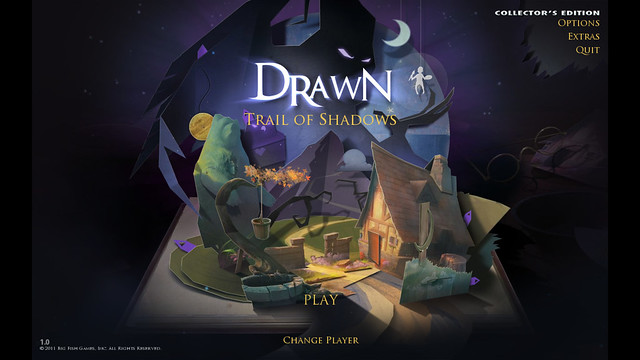
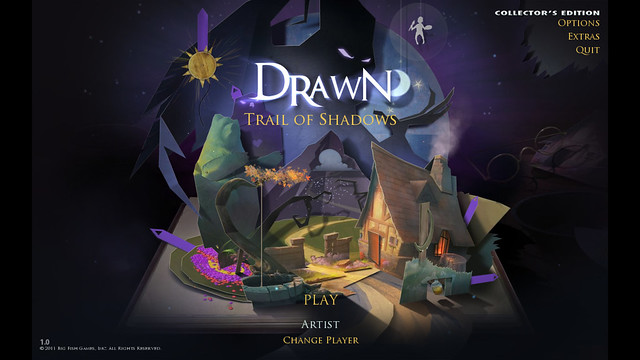
+ It is very interactive, more so than most hidden object games. Even unimportant scenes (such as the main menu -- see screenshots below) has interactive elements. There's a strong sense of "lots to see and do", despite the fast pacing of the story and gameplay.
+ Unlike many hidden object games, you are not tasked to find meaningless items, nor items that are broken or disassembled so that each piece is difficult to pick out. Instead, you look for or interact with items that further the story.
+ The hidden object sequences are so easy that this game is really more of a puzzle game where you have to figure out what to do. While the difficulty may be a bit of a let-down for someone looking primarily for a hidden object game, it also gives the game a faster pacing so you are not bogged down with meaningless tasks.
+ Some of the puzzles are either really hard or really long (such as the croquet game in area 2, The Garden). Fortunately there is a "Skip" button if you want to keep moving ahead in the story -- thus catering to both player who want to experience the story, and players who want to play mini-games.
+ Although the scope of action is mundane enough at the start, it quickly expands to epic proportions, such as colossal caves and moving mountains. The story isn't so compelling, but the visuals and surprises are first class.
-+ It's a short game, as most casual games are. The pacing is good but if you skip some of the mini-games / puzzles that frustrate you, it can end up feeling like a very short game you can do in a few hours. However, for the asking price ($14, down from $20 -- prices in Canadian dollars, as of November 2nd, 2011), you can't expect 50-200 hours of gameplay, like a full-fledged game from a large studio like Bioware or Bethesda. While we took a point off for the shortness of the game, we also gave a point for its low cost, which will only get lower as time goes by. Wait a year or so and you might even get it for $3 -- Big Fish Games run frequent promotions.
Early versions were reported to have had game-stopping bugs. It is probably all resolved now by version 1.2, but we never experienced an inability to complete the game, even at version 1.0.

0 - 001

0 - 002

Drawn 3 Wallpaper 05

Tuesday, October 18, 2011

Dragon Age Origins - Spell Tactics 1


Dragon Age: Origins Spell Tactics - Part 1

This is one of our Dragon Age: Origins walkthrough / cheats / mods posts. In this post, we will cover early-game spell selection and tactics.

Magic and Willpower Scores
Whatever race you begin with, it is generally safe to maximize your Magic score early, and aim for 30+ points, depending on what you want. After that, you will have to decide whether you want to keep increasing Magic or start diversifying into Willpower so that you have more innate Mana to work with. You can always make up Mana with Lyrium potions, but that is a play style decision.
Spellpower is (Magic - 10). The effect of Spellpower is to generally increase the effect of your spells by 1% per point of Spellpower. At 100 Spellpower (110 Magic), your spells are twice as powerful. For example, the Lightning spell does [(100.0 + Spellpower) * 0.3] Electrical Damage to health, and drains Stamina by a like amount.

Early Spell Selection
Magi in the campaign (Circle Mage origin story) start with Arcane Bolt, so the need for a basic offense is alleviated. Also, throughout the game you will typically have access to a warrior to soak hits for you.
All mages should take advantage of the long range on Arcane Bolt (or a bow or staff) to draw enemies to them (preferably one or two at a time so you can overwhelm them with the rest of your party). Against archers you can probably trade fire until you win. Against mages, get their attention then move behind cover to bring them closer before engaging them away from their bodyguards. 

There are three obvious types of builds: Damager, Controller/Debilitator, and Supporter/Healer. In the early game, being a Controller/Debilitator is a useful choice as your Mana is limited so you might as well try to get some teamwork going to let your allies deal damage. Early healing spells are quite weak, so you might want to wait for the Spirit Healer specialization.

Damager
The basic technique in the early game would be to get several attack spells and just cycle through them, burning through your mana but pumping out enough damage to quickly win. Aim for the cone attack spells -- Flame Blast, Cone of Cold, and Shock as you will be rushed in melee anyway so you might as well have a strong attack. All three back to back can do an enormous amount of damage and is not to be underestimated. You will probably want to start with Cone of Cold to hold everyone in place for more hurting.
If you rely on this combination, the Hexes are worth taking as well: Affliction Hex for certain (for the area-effect debuff against all your damage spells); and possibly Misdirection Hex if you are hounded by a dangerous boss while up close to use your cone spells.

As for the spells along the way, Winter's Grasp is strong in the early game as it has a (100 - 5 x target level)% chance of temporarily freezing a target. You can't freeze and Shatter anyone until Cone of Cold, and even then you can't rely on it for anything other than white-name minions.
Also, all Lightning spells reduce enemy Stamina by an amount equal to the damage done.
Once you move up the tree, only Fireball (which can do knockdown) and Cone of Cold (which can freeze) are critical. After that, you can choose one of the the three wide-area spells. Unless you are also aiming to cast Storm of the Century on your own, Inferno is probably the safest bet for doing a lot of damage in the minimal time you have your enemies inside the area of effect. Blizzard seems like the obvious choice for both damage and holding the enemy, but our tests showed only a poor chance of freezing, and then only for a very short time. Tempest, like all lightning-based spells can reduce enemy stamina, but is otherwise unremarkable.
Chain Lightning was unimpressive for its long casting time, but there is no friendly fire despite the spell description.

It is probably useful to stop and get Glyph of Repulsion to cast Paralysis Explosion and hold your enemy in the area of your wide-area damage spell. All the wide-area damage spells and all the Glyphs are Indirect -- you do not require line of sight -- and therefore can cast it from behind a hill or even into the fog of war from a closed room. Getting the drop on the enemy with paralysis and holding them in a killzone is priceless, so watch for the positioning available to do it.

The Draining spells offer an alternative route that should probably be used in tandem with the other Damager options. All the spells here are indirect. Drain Life heals you, although it is best combined with Vulnerability Hex, which will also help your other attack spells. Death Magic should only be turned on as-needed not just to conserve available corpses but to keep your Fatigue low. Curse of Mortality negates enemy healing, which may occasionally be an issue, especially against other mages.
Death Cloud is not really remarkable except if you commit to getting Death Hex, and then the cooldown on Death Hex means you really only get a one-shot huge-damage spell against a boss from the Entropic Death combination.

To play a Damager Mage, I would go for Winter's Grasp, Drain Life, Cone of Cold, Shock, Fireball, Vulnerability Hex, Glyph of Repulsion, Inferno.
Fireball is great for starting a fight, but you really get just the one shot before you are swarmed. The knockdown, huge damage (initial plus burning), and short cooldown makes it tempting to aim for early, however, and that is certainly one way to go since an Elf Mage can get it by level 3. If you can do enough damage early, you can pick of the badly hurt stragglers.

Controller/Debilitator Mage
Probably the best Controller mage option is Glyphs, all of which have the tactically priceless benefit of being Indirect. Overall, I recommend Glyphs as any mage's first choice for spells as it helps both themselves and parties of non-mages, and is useful throughout the career of your spellcaster and in whatever party they participate in. Aim for Glyph of Repulsion at the very least, for Paralysis Explosion.

The basic use of Glyph of Paralysis is as a trap to snare the first target that triggers it. However, if you cast it at a clump of enemies, you can see which ones will be affected because they gain a red highlight when you move the area of effect template around. You can therefore try to paralyze several. And no Friendly Fire also means you can possibly help out another character who is being swarmed.

Glyph of Paralysis is resisted with Physical Resistance which most grunts will have a decent amount of, but the Paralysis Explosion spell combination of Glyph of Paralysis + Glyph of Repulsion is resisted by Magic Resistance -- which means even bosses might be affected (although on Nightmare Difficulty, all enemies have +10% Magic Resistance). Therefore, if you started with Glyph of Paralysis and it failed, you can try following up with Glyph of Repulsion to trigger a Paralysis Explosion. Friendly Fire IS possible, so you may want to cast it at a distance from you even if neither component Glyph hits anything initially, and let the effect wave catch up with enemies rushing at you.
In tests, Paralysis Explosion seemed much more reliable than freezing from Blizzard and in any case lasted longer -- up to 20 seconds for a low-ranked creature.

Glyph of Repulsion helps both mages and archers, and you can retreat a wounded character inside as well if you don't have Force Field to absolutely protect them. Be careful with AI tactics settings as it doesn't take into account triggering a Paralysis Explosion, and player characters are treated as the lowest ranked enemies (full 20-second paralysis).

Glyph of Warding gives you a flat bonus of +30 Defense (chance to avoid being hit), +30% Missile Deflection on top of that, and +50 Mental Resistance, for 20 seconds. No effect from Spellpower, apparently. Definitely worth trying if you are trading missile fire, but generally combatants in melee move around too much for a fixed-location Glyph to be often useful. In melee, it is probably best used when you (or more likely, your allies) are already engaged in melee. According to Dragon Age Wiki it stacks, so theoretically with three casters warding the same space you get +90 Defense and +90% Missile Deflection.

Glyph of Neutralization is a specialized spell that can be used offensively to disable spell casting, or defensively to protect you from it. Since you are yourself a mage, you will probably be using it to protect your allies unless you are willing to sacrifice your own spell ability.
When used offensively, you cast it on a mage and instantly drain it of all Mana, giving you at least several seconds, if not more, of respite from magic. This works with equal effect on Bosses. (Also, you can still cast Force Field or Crushing Prison on the target while it is on the Glyph, although this is probably a scripting oversight.)
When used defensively against a magic assault, you will probably want to sit all your allies inside the Glyph and shoot at the enemy. The trick is knowing whether the enemy is actually using Magic against you, or some Stamina-based power which would not be affected by the Glyph's protection.
In any case, this is a mid-game or late-game spell as you can typically find other workarounds against mages. It is also a short-cut to magic defense if you already have Glyphs, instead of starting on a very specific-use magic defense tree.

The are two main options to Glyphs: Telekinesis and Sleep. Telekinesis is strong against single targets. Sleep has some target limitations and is not Indirect.

From the Telekinesis spell tree, Mind Blast is interesting because it ALWAYS works. The only consideration is duration (reduced for higher-ranked enemies), but even a single second of Stun can be useful in, for example, freeing an ally that has been Grabbed by an Ogre. Other than this, the extremely short duration and lack of range severely limits its usefulness despite having no Friendly Fire.

Force Field is another very interesting spell because it can protect a vulnerable ally for a while. For example, a Warrior who has just used Taunt to draw enemies to them could be protected while other characters continue to attack, or a powerful area effect spell is dropped on the area. Also, like Mind Blast, Force Field always works. The rank of an enemy can reduce the duration, but with a base duration of 20 seconds you can expect a few seconds of respite no matter what. Further, there is no defense against it except Crushing Prison since Anti-Magic Ward is bugged.

Crushing Prison is also very powerful as it neutralizes a target like Force Field, and inflicts damage, and you can continue to attack the target. Bosses (Orange name) and Elite Bosses take only a fraction of the possible damage potential and are not paralyzed, so it is best used to take out a dangerous Lieutenant (Yellow name), such as a spell caster, as part of a strategy to overwhelm them and take them out before they can retaliate with a dangerous spell.
It can also prematurely end a Force Field on an ally with the Shockwave combination. And since Shockwave does not affect the target inside the Force Field, you can turn Warriors with Taunts into booby traps toward the end of the Force Field duration (which you should be able to see by looking at their quickbar, which lists active effects and their remaining duration).
Enemies can use this dangerous spell against your own magi, and there is no way to prematurely end it except with Force Field to create a Shockwave since Anti-Magic Ward (and therefore, Glyph of Neutralization as well) is bugged.

The Sleep spells tree does not work against every opponent type so is slightly less desirable (and has steep Magic attribute requirements), but when it does work it is extremely powerful -- no Friendly Fire, very wide area effect from Sleep, no resistance check on Horror and Waking Nightmare if a target was put to sleep, and it can turn enemies on themselves, which provides a different type of protection/enemy neutralization than Glyphs. The Nightmare spell combination has a flat 10 second duration that is not reduced by target rank, so even bosses are neutralized for 10 seconds if they are affected at all. Finally, Waking Nightmare has a tendency to create enemy clumps that ignore you, so it can be used to facilitate Walking Bomb or Virulent Walking Bomb, but even so those are tricky spells to use without blowing yourself up on Hard or Nightmare Difficulty.

The lack of Indirect spellcasting is regrettable but it is still powerful because there is no Friendly Fire. It also has the benefit of dealing damage either directly (Nightmare) or indirectly (Waking Nightmare), which Glyphs do not have. An elf can advance in this tree the fastest, but even then won't get Sleep until level 4 and Waking Nightmare until level 6, whereas you can get Paralysis Explosion by level 3. No particular reason not to get both especially if you have a lot of backup to deal damage for you.

In tests, we found the Debilitation spells worthless considering the other options. No Friendly Fire but not indirect and the duration wasn't substantially longer than other spells. Still resisted by Physical Resistance, which makes them all iffy anyway. I would rather start close with indirect fire from cover and then rush in with all party members than get the enemy's attention by coming close enough to cast my spell. Also, Mass Paralysis has a long casting time (but no Friendly Fire).


To run a Controller/Debilitator, I recommend aiming for Glyph of Repulsion, some damage spells, Waking Nightmare, Heal, then Glyph of Neutralization.


Supporter/Healer Mage
Healing and Buffs are somewhat weak and Mana-costly in the early game, so a passive healer mage is generally not recommended unless you are willing to drink Lyrium Potions to maintain a steady stream of magic to help your allies fight. Also, the spells that restore Mana (like Spellbloom) are lousy unless someone casts them on you. Further, Rejuvenate cannot be cast on yourself -- you have to wait until Mass Rejuvenation.

That said, there are some very good spells to try to neutralize a dangerous target if you are willing to spend the spells to reach them. We've already talked about the Telekinesis spells and Glyphs, all of which have very short effects on bosses. The other main one is a later-game option of Hexes, primarily Misdirection Hex and Death Hex. I put these as late-game options because only then would you probably need the extra edge from these spells. The duration is fixed against all target ranks and there is no resistance (except Magic Resistance) but the costs are high and the cooldowns are very long so they are temporary respite at best for a fight long enough and dangerous enough to need them. You would probably be better off with the more generically useful Healing and Group Heal from the Spirit Healer specialization.

Other buffs are iffy in usefulness. For example, the Enhancements spell tree can give you an Attack Bonus with Heroic Offense, but it costs a lot, and if the ally isn't having trouble hitting, it's really not a useful spell at all since a hit is a hit. The higher-level spells, like Heroic Defense also give a penalty (5% Fatigue) and Haste has a built-in cap on its effect due to on-screen animation limits.

To run a Supporter/Healer, I recommend aiming for Glyph of Repulsion, Force Field, Heal, Crushing Prison, Regeneration, Glyph of Neutralization, and finally Mass Rejuvenation.
Tuesday, October 4, 2011

X-Men Legends 2 - Walkthrough - Act III


Starting A New Game in X-Men Legends 2: Rise of Apocalypse (for PC) - Walkthrough - Act III

This is one of our X-Men Legends 2 walkthrough / cheats / mods posts. For an index of all X-Men Legends posts, click here.

  • Some areas may require you to break through walls to ge around obstacles, but the action here is still pretty straightforward. In many areas, you can look into the next room by being close to a wall. This then allows you to use indirect fire powers (such as Storm's Blizzard) without fear of retaliation, especially if you can keep your party members from pathfinding their way through a door to attack your enemies.
  • You start to encounter several enemies with Invulnerability except to certain maneuvers.
    • You probably have to hit them several times with the indicated combo to deactivate the invulnerability.
    • Experiment with various characters to see if their powers will ignore this. For example, Scarlet Witch's Hex Bolt, Hex Locked, and Reality Shift can still damage targets even while their invulnerability is active.
    Sugarman
    Really tough in melee, and his tongue attack is quite fast. If you don't move quickly, he can hit you with it repeatedly and keep knocking you down.

    • He can hit you quickly and repeatedly with his Tongue attack and never give you a chance to act. If you can't get away from the Tongue attack, switch characters. He should then redirect his attention to another character as he is very focussed on pursuing whichever character you are controlling. Use the Call Allies function to have your party attack him instead of follow you.
    • The Tongue attack fires straight forward and cannot hit targets above, below, or to the side. You can therefore sidestep or jump away. You can also run and keep him frustrated by going up and down the stairs. This lets a support character cast group buffs or healing.
    • He needs to turn around to use his Tongue attack since it fires directly forward, so you could briefly switch characters to someone behind him and pound on him, then switch to another character once he has you targeted by his Tongue attack. A strong melee character can actually make short work of Sugarman in less than 30 seconds if you can stay on his flank.

    X-Men Legends 2 - Walkthrough - Act II


    Starting A New Game in X-Men Legends 2: Rise of Apocalypse (for PC) - Walkthrough - Act II

    This is one of our X-Men Legends 2 walkthrough / cheats / mods posts. For an index of all X-Men Legends posts, click here.

    Sauron

    • Try to have a character with either a fast ranged attack (e.g., Jean Grey's Telekinesis) or an indirect attack that starts at the target (e.g., Storm's Lightning). This will make it easier to attack Sauron while he's flying around.
    • Once on the ground, you have just a few seconds to pound on him before he stuns everyone and takes to the air again. The stun seems quite unavoidable.

      Mikhail Rasputin
      Another multi-stage boss, and this one quite irritating.
      • Stage 1: Duplicates
        • To take a break, you can go to the edges of the room. Generally this will draw maybe 1 to 3 duplicates. Defeat them and you should be able to take a breather.
      • Stage 2: Force Field
        • To lower the force field around Mikhail, you need to activate consoles on each of the four pads.
          • Mikhail can transform consoles into minions. You need to defeat them to transform them back into a console.
          • You can only activate a console on each pad once, so you need to move around to each console, and defeat a minion while it is on the console. When a minion is eligible to turn into a console you can use, it will have an arrow on its head. If the console that is created is valid, it will have a green arrow on top of it.
          • Mikhail's energy beams fire more quickly when there are fewer force fields. They cannot penetrate objects, so you can hide your active character behind one. They cannot hit fliers, so you can hover over a console and wait for your allies to defeat an enemy on a valid pad and get you a console to use.
          • Teammates mostly automatically leap over console beams, so just focus on keeping your currently controlled character out of trouble.
      • Stage 3: Mikhail Time Slow
        • Once the force fields are down, you enter the final phase of combat. Mikhail can slow time for everyone, whereupon he rushes in to pound on the currently controlled character.
        • Mikhail can transform crates into minions, but only if they are on the screen. If you don't move too far from the initial area, he won't have anything to transform into a minion.

      X-Men Legends 2 - Walkthrough - Act I


      Starting A New Game in X-Men Legends 2: Rise of Apocalypse (for PC) - Walkthrough - Act I

      This is one of our X-Men Legends 2 walkthrough / cheats / mods posts. For an index of all X-Men Legends posts, click here.

      General Notes
      Act I is pretty straightforward. When you are putting together your team, try to have a healer as it lets you fully heal between fights without resorting to potions. You probably won't get any healing abilities until level 14, however.

      Combat is fast and furious and prone to traffic jams. The sooner you get area effects or area stun (even for a very short while), the better.

      The only tough encounters here are the bosses, as you are still at a low level. We have general tips on bosses in this post -- scroll down to General Hints.

      Because you have teleporters on your team (Nightcrawler; and once you have finished the game, you can unlock Deadpool) some very few locations will require a teleporter. There is one such location where a door cannot be opened but you can teleport into the room to destroy two controls to lower force fields.

      Abyss
      The final encounter here is against Abyss. He has a whirlwind power you cannot defend against and knocks you down at the end, but it isn't really dangerous except that he usually gets a free melee hit against you afterwards. His melee attacks are very long range and do a lot of knockback, although this can result in pushing you out of the way and then you can quite safely use ranged attacks. Keep your distance and use Call Allies to get your teammates to attack him with powers instead.

      When he flees, you can take your time clearing the room of containers before following him to the dirigibles. Once there you have a full minute and can spend some of it smashing the many densely packed crates for goodies.

      On the dirigible, you need to grab the bombs he throws and throw them back at his dirigible. If you try to leap or fly across, you will be dragged down between the space between the ships and be instantly KO'ed. If you hit anyone else, it will explode and harm you but may not harm your dirigible.

      When Abyss's ship has been destroyed, Abyss will hop over. Leave him for your teammates and instead keep your distance and focus on the soldiers and collecting health potions for your teammates. If you get too close to him, he'll just knock you down, giving the soldiers free hits against you. At this point you can either take a strong melee character or a character with area effect powers to clear the soldiers quickly. This is the final tough encounter against Abyss. Once defeated here, he sucks the team into an extra-dimensional space.

      Once inside him in the extra-dimensional space, take out the flying creatures then activate the four bombs. Nothing tricky here.

      Marvel Ultimate Alliance - Walkthrough, Cheats, and Mods


      Walkthrough, Cheats, and Mods - Marvel Ultimate Alliance (for PC)

      Marvel Ultimate Alliance is essentially a very straightforward game since there are often either quest markers to guide you to where you need to go next, or the level design is very linear anyway.

      A very good detailed guide for the PC can be found here: I will only have notes, cheats, and mods for tricky quests, things that you may not have thought to do, and various things you can do to mod the game for your convenience.

      Overall, Marvel Ultimate Alliance is a tedious game of repetition. You keep killing things over and over again as you retry difficult missions and minigames until you succeed. The hardest battles in the campaign are not about the skill of your heroes but your own hand-eye coordination. If you don't succeed, you're stuck. We'll mod and cheat our way through (if necessary) the most annoying aspects of it so that you won't be stuck with no way to continue.

      X-Men Legends 2 - Starting a New Game and General Hints


      Starting A New Game in X-Men Legends 2: Rise of Apocalypse (for PC), and General Hints

      This is one of our X-Men Legends 2 walkthrough / cheats / mods posts. For an index of all X-Men Legends posts, click here.

      Starting a New Game
      Before you start a new game, you may want to consider modding it a bit, or doing certain things to prevent having to replay the entire game from the start.

      • Unlocking Characters
        • You can unlock Deadpool, Iron Man, and Professor Xavier by adding the following lines to the end of ...\Scripts\act1\sanctuary\sanctuary1.py:
        unlockCharacter("ironman", "" )
        unlockCharacter("professorx", "" )
        unlockCharacter("deadpool", "" )
          • You can then go to the Genosha Sanctuary again to unlock those characters. Or, if you are starting a new game, the characters will be unlocked when you finish the tutorial and reach the Genosha Sanctuary for the first time.
        General Hints
        We have hints everywhere throughout our walkthroughs. These are just some hints that don't belong anywhere else.
        • There are basically four types of characters: Specialists and Generalists, Power and Melee.
          • Power characters prioritize stats in order of Focus, Speed, Body, Strike.
          • Melee characters prioritize stats in order of Strike, Body, Speed, Focus.
          • Specialists advance in only 3 stats, at a rate of +5/4 levels, +2/4 levels, and +1/4 levels. At level 99 this is +123, +49, +25
          • Generalists advance in all four stats: +4/4 levels, +2/4 levels, +1/4 levels, +1/4 levels. At level 99, this is +99, +49, +25, +25.
        • Ability scores are capped at 250 before equipment. Once you max a score, future increases from level gain are wasted.
          • Each level you get 4 points to add in any way you like (total 396 over 99 levels). You can bank these. As a general guideline we recommend you spend about 80-100 on your main attribute (Focus or Strike) and 150 on Body. This way, you still have room to let levelling maximize those attributes.
          • Tech stations can add a total of +30 to each stat and can increase them beyond what you can do with Attribute points from levelling up.
            • +Body
              • +2 - Act 1, Grand Hall 
              • +4 - Act 2, Nuwali Shrine
              • +6 - Act 3, Madri Antechamber
              • +8 - Act 4, Stockade
              • +10 - Act 5, Temple of Anubis
            • +Focus
              • +2 - Act 1, Desolate Mesa
              • +4 - Act 2, Beyonders Sanctum
              • +6 - Act 3, Madri Cloisters
              • +8 - Act 4, Pantheon
              • +10 - Act 5, Temple of Sekhmet
            • +Strike
              • +2 - Act 1, Dead Zone
              • +4 - Act 2, Elemental Tomb
              • +6 - Act 3, Infinite Engineering
              • +8 - Act 4, Perimeter Platforms
              • +10 - Act 5, Vault of the Ages
            • +Speed
              • +2 - Act 1, Cerci Burrows
              • +4 - Act 2, Jungle Pass
              • +6 - Act 3, Core Interior
              • +8 - Act 4, New York West Side
              • +10 - Act 5, Hall of the Dead
            • Health
              • +10 - Act 1, Larvae Chambers
              • +20 - Act 2, Jungle Ruins
              • +30 - Act 3, Fusion Core
              • +40 - Act 4, Tower Engineering
              • +50 - Act 5, Ra's Mouth
            • Energy
              • +10 - Act 1, Genosha Seawall
              • +20 - Act 2, Nuwali Corridors
              • +30 - Act 3, Genetic Processing
              • +40 - Act 4, New York North Side
              • +50 - Act 5, Ancient Labyrinth
          • Danger Room missions can add to stats and increase them beyond what you can do with Attribute points from levelling up. Challenges improve only the indicated character.
            • +9 Body
              • Moves 104 - Throw
              • Moves 106 - Knockback
              • Moves 202 - Popup
              • Survival 301
              • Assault 303
              • Sabotage 401
              • Survival 404
              • Survival 504
              • Nightmare 504 - Bastion
              • Challenge - Cyclops
              • Challenge - Juggernaut
            • +10 Focus
              • Teamwork 105
              • Moves 108 - Stun
              • Qualifying Exam 100 - Lady Deathstrike
              • Moves 201 - Trip
              • Qualifying Exam 200 - Sauron
              • Teamwork 403
              • Defend 503
              • Qualifying Exam 500 - Stryfe
              • Nightmare 502 - Sauron
              • Nightmare 505 - Stryfe
              • Challenge - Phoenix
              • Challenge - Magneto
              • Challenge - Rogue
            • +6 Strike
              • Moves 103 - Triple Hit
              • Assault 203 - Strike
              • Teamwork 302
              • Defend 402
              • Assault 502
              • Nightmare 503 - Sugarman
              • Challenge - Gambit
              • Challenge - Iceman
              • Challenge - Colossus
              • Challenge - Bishop
            • +8 Speed
              • Setting 102 - Throwing
              • Combined Powers 107
              • Defend 204 - Speed
              • Destroy 304
              • Qualifying Exam 300 - Sugarman
              • Graduation Exam 400 - Bastion
              • Protect 501
              • Nightmare 501 - Lady Deathstrike
              • Challenge - Toad
              • Challenge - Scarlet Witch
              • Challenge - Sunfire
              • Challenge - Nightcrawler
              • Challenge - Storm
              • Challenge - Wolverine
        • Bosses are very challenging because they target your currently controlled character and tend to do a lot of knockback.
          • In general, try to choose a ranged attacker, and in the meantime use the Call Allies (C) button to get your teammates to attack.
          • If possible, have the chosen character be either a booster (can cast buffs, especially healing, such as Scarlet Witch, have area effect attacks, or attacks that manifest at the target instead of having to be aimed (e.g., Storm's Blizzard).
          • Teammates not being controlled y you seem to do remarkably well against bosses. Also, they will automatically use health potions.
          • The character you control should run away from the boss. Since it is pursuing you, it will generally leave its flanks open to your teammates. If the boss is a melee attacker, try to go to some vantage point or position where the boss will have trouble pathfinding to you.
        •  Be careful about any opponent that has a damaging aura (such as a green radiation aura).
          • You can't really pull back your allies except by running away far enough, so you will either have to commit to using a lot of potions, trying your own healing powers, or taking your chances and pulling back to regroup. If you do the latter, you may be able to draw out the enemies and focus on one at a time.
          • If you don't watch it, your AI-controlled characters will rush into melee and get themselves killed. They won't necessarily target the damage-aura opponent first, and even if they do they might end up with very little health left.
        • If you find the Danger Room time limits challenging, or just don't want to be bothered with the stress of doing them quickly, try our X-Men 2 Danger Room time mod, which gives you an hour to complete objectives.

          X-Men Legends 2 - Walkthrough, Cheats, and Mods


          X-Men Legends 2: Rise of Apocalypse (for PC) - Walkthroughs, Cheats, and Mods

          This is the index of all our X-Men Legends 2 walkthrough / cheats / mods posts.

          1. Starting a New Game - Things you may want to do before you start a new game, to avoid too much re-playing. Some general hints.
          2. Missions
            1. Act I - Genosha
            2. Act II - Savage Land
            3. Act III - Apocalypse Bases
            4. Act IV
            5. Act V

          Monday, September 19, 2011

          Marvel Ultimate Alliance - Wolverine


          Marvel Ultimate Alliance (for PC) - Playable Characters - Wolverine

          This is one of our Marvel Ultimate Alliance walkthrough / cheats / mods posts. For an index of all Marvel Ultimate Alliance posts, click here.

          A list of all character notes: Black Panther, Blade, Captain America, Colossus, Daredevil, Deadpool, Doctor Strange, Elektra, Ghost Rider, The Human Torch, Iceman, Iron Man, Invisible Woman, Luke Cage, Moon Knight, Mr. Fantastic, Ms. Marvel, Nick Fury, Silver Surfer, Spider-Man, Spider-Woman, Storm, Thing, Thor, Wolverine

          • He has a Rage power and free powers that require him to be in a Rage, so he gets less Skill Points when he levels up.
          • One of the few characters who have a Healing Factor (Deadpool, Wolverine). This means in theory you can keep blocking and wait for your health to recover, since blocking makes you immune to just about everything.
          • You may want to test whether any power other than Fury is worth developing since very high-level rage has him attacking very quickly and you may do more damage that way, or keep the enemy unbalanced and unable to retaliate.
          Powers: (at Skill Level 10)
          • Claw Slash (16 Skill Points, 28 Energy)
            • Increased melee attack that causes bleed damage.
            • 139-154 Physical Damage, 41-45 Bleed damage
          • Eviscerate (14 Skill Points, 28 Energy)
            • Radial damage to nearby enemies with heavy thrust into a single second target.
            • 68-75 Physical Damage, radius
            • +17% Physical Damage to bleeding victims
          • Fury (16 skill Points, 116 Energy, 80 seconds)
            • Boost damage, speed, and rage.
            • +10% Physical Damage, +30% Attack Speed, +68% Rage per hit
          • Lethal Lunge (16 Skill Points, 29 Energy)
            • Wolverine launches forward, knocking back enemies where he lands, and brutally slashes his target.
            • 143-157 Physical Damage, 51 foot knockback.
            • +100% Rage.
          • Rage Attacks (usable only when Raging)
            • Spin Attack (Rage, 28 Energy)
              • Spin forward, hitting multiple targets with claws.
              • 102-113 Physical Damage.
            • Taunt (Rage, 116 Energy, 80 seconds)
              • Forces enemies to attack Wolverine. Affected enemies do less damage and are forced to melee.
              • Huge potential for synergy with Nick Fury (Motion Sensor) and Thing (Die Hard).
              • -65% Damage from affected enemies.
            • Spin Attack (Rage, 15 Energy)
              • Spin forward, hitting multiple targets with claws.
              • 34-38 Physical Damage.
            • Certain Death (Rage, 38 Energy)
              • Impale the enemy on Wolverine's claws, lift them up, and throw them down.
              • 54-60 Physical Damage. 79% chance of instant kill.
            • Claw Frenzy (Rage, 17 Energy)
              • Multiple slashing attacks with each hit increasing attack speed for a time.
              • 44-49 Physical damage.
              • +14% speed per hit for 6 seconds.

          Marvel Ultimate Alliance - Thor


          Marvel Ultimate Alliance (for PC) - Playable Characters - Thor

          This is one of our Marvel Ultimate Alliance walkthrough / cheats / mods posts. For an index of all Marvel Ultimate Alliance posts, click here.

          A list of all character notes: Black Panther, Blade, Captain America, Colossus, Daredevil, Deadpool, Doctor Strange, Elektra, Ghost Rider, The Human Torch, Iceman, Iron Man, Invisible Woman, Luke Cage, Moon Knight, Mr. Fantastic, Ms. Marvel, Nick Fury, Silver Surfer, Spider-Man, Spider-Woman, Storm, Thing, Thor, Wolverine
          • Key Powers: North Wind, Wrath of the Gods
          • The most expensive hero in terms of Skill Point requirements. Even at level 99, he can't max out all powers.
          • The only character with a 300-damage Xtreme power.
          • One of the few characters who have a 300-damage power (Mjolnir's Might).
          Powers: (at Skill Level 10)
          • Asgard's Blessing (21 Skill Points, 128 Energy, 110 seconds)
            • Increases skill ranks for entire team temporarily.
            • +3 Points to skills.
            • Comments:
              • Affects outfit powers as well, if you have at least one rank in the power from the currently worn outfit.
              • Maximum rank is 10. In the early game you won't need it. By mid- to late- game, this is a useless power as you will likely have maximum ranks in the powers you use frequently.
          • God Speed (16 Skill Points, 92 Energy, 80 seconds)
            • Increase speed of all standard attacks.
            • +83% speed increase.
          • Hammer Toss (23 Skill Points, 34 Energy)
            • Throws hammer, stunning enemies.
            • 117-130 Physical Damage and stun, to all enemies the hammer passes through.
            • Comments:
              • The hammer will boomerang back after a distance or when it hits a wall. If there is a wall behind the target, you can be reasonably certain of getting in two hits on the same target.
              • The stun duration is not clear but at least a couple of seconds.
          • Mjolnir's Might (16 Skill Points, 23 Energy)
            • Hammer attack. When fully charged, has a chance to instant-kill stunned enemies.
            • 136-150 Physical Damage, Chargeable (x2 damage, +1 Energy cost)
            • 8% instant-kills a stunned target.
            • Comments:
              • Thor will rush at the current target in a straight line, so you don't have to be in melee distance. However, if the target moves laterally, Thor will miss.
          • Mjolnir Slam (16 Skill Points, 30 Energy)
            • Massive hammer slam.
            • 54-60 Electricity Damage, 3 foot radius.
          • North Winds (16 Skill Points, 21 Energy/second)
            • Swing magical hammer in a circle to create a massive whirlwind. Hold to increase radius.
            • 80-89 Wind Damage per second.
            • Comments:
              • You can maintain this power until you run out of Energy. Enemies that enter the effective radius are swept up. Enemies caught in the power are helpless. Because of these factors, this is one of the best attack and crowd control powers, although you are unlikely to be swarmed often enough in the campaign to need it frequently.
              • Storm has a similar power accessible at a lower level.
          • Thor's Rage (18 Skill Points, 36 Energy)
            • Summons lightning down on victim. Can chain to more victims at higher levels with rapid tapping.
            • 120-133 Electricity Damage on one target.
            • 16 Electricity Damage per tap, x 5 targets.
          • Wrath of the Gods (Xtreme)
            • Bring down lightning from the sky, dealing Electricity damage to all nearby enemies. Also restores energy to the entire party.
            • 339-375 Electricity Damage.
            • 70% Energy restored.
            • Comments:
              • Other than the instant-kill Xtreme powers, this is one of the strongest Xtreme powers in terms of raw damage output. However, it does energy damage, so any Energy Resistant foes will take very little damage.
              • The energy restoration in this power makes it doubly dangerous since you can follow up with North Winds to clean up any (weakened) survivors.

          Marvel Ultimate Alliance - Thing


          Marvel Ultimate Alliance (for PC) - Playable Characters - Thing

          This is one of our Marvel Ultimate Alliance walkthrough / cheats / mods posts. For an index of all Marvel Ultimate Alliance posts, click here.

          A list of all character notes: Black Panther, Blade, Captain America, Colossus, Daredevil, Deadpool, Doctor Strange, Elektra, Ghost Rider, The Human Torch, Iceman, Iron Man, Invisible Woman, Luke Cage, Moon Knight, Mr. Fantastic, Ms. Marvel, Nick Fury, Silver Surfer, Spider-Man, Spider-Woman, Storm, Thing, Thor, Wolverine
          • Key Powers: Die Hard. One of two strong damage-reducing powers for the whole party (Nick Fury's Motion Detector, Thing's Die Hard). Theoretically you can have strong synergy here with both of them active, and further stack it on Thing (Tough Skin) and Wolverine (Taunt).
          • One of a few characters with 300+ damage powers (Uppercut).
          • Thing seems to be too heavy for enemies to grab and throw. Super Soldiers don't seem to try it.
          Powers: (at Skill Level 10)
          • Bullrush (11 Skill Points, 17 Energy)
            • Thing charges forward, destroying everything in his path and sending enemies flying out of the way.
            • 99-109 Physical Damage.
          • Die Hard (12 Skill Points, 116 Energy, 40 seconds)
            • Makes all party members resistant to melee Damage but more vulnerable to other types of attacks.
            • Party takes 55% less melee Damage, 11% more non-Melee damage.
          • Earthclobber (14 Skill Points, 36 Energy)
            • Using both fists, Thing smashes the ground, causing huge ripples in the earth knocking enemies off their feet. Double damage to enemies lying on the ground.
            • 51-56 Physical Damage, radius, Chargeable (x2 damage)
          • Hand Clap (16 Skill Points, 32 Energy)
            • With thunderous might, Thing claps his hands together and creates a concussive wave that blasts and stuns enemies in front of him.
            • 85-94 Physical Damage, cone, 5 second Stun.
            • Comments:
              • You may want to just have 1 skill level of this for the Energy-low usage and 2 second Stun. For crowd control, go with Earthclobber in the long run as that is radial. At high levels, both cost almost the same in Energy except Hand Clap is not radial.
          • Tough Skin (16 Skill Points, 116 Energy, 60 seconds)
            • Mutates skin into spiky rock plating, resistant to all damage, especially from melee attacks.
            • Take 59% less Melee Damage, 13% less non-Melee Damage.
            • Comment: Huge potential for stacking with Die Hard and Nick Fury's Motion Sensor.
          • Uppercut (16 Skill Points, 28 Energy)
            • 136-150 Physical Damage, Chargeable (x2 damage)
            • Comment:
              • There is only short forward movement. Depending on the angle you launch this, you can hit more than one target.
          • Rock and Roll (XTreme)
            • Slam into the ground, dealing massive Physical damage and a chance to slow targets.
            • 102-113 Physical Damage
            • 20% chance of Slow for 20 seconds.

          Marvel Ultimate Alliance - Storm


          Marvel Ultimate Alliance (for PC) - Playable Characters - Storm

          This is one of our Marvel Ultimate Alliance walkthrough / cheats / mods posts. For an index of all Marvel Ultimate Alliance posts, click here.

          A list of all character notes: Black Panther, Blade, Captain America, Colossus, Daredevil, Deadpool, Doctor Strange, Elektra, Ghost Rider, The Human Torch, Iceman, Iron Man, Invisible Woman, Luke Cage, Moon Knight, Mr. Fantastic, Ms. Marvel, Nick Fury, Silver Surfer, Spider-Man, Spider-Woman, Storm, Thing, Thor, Wolverine
          • Key Powers: Whirlwind. See notes on Thor's North Winds, which is a similar power.

          Powers: (at Skill Level 10)
          • Blitz (9 Skill Points, 33 Energy).
            • Radial lightning attack. Does extra damage against slowed enemies.
            • 54-60 Electricity Damage.
            • Comment:
              • Iceman and Thing has various powers that can slow enemies.
              • Probably won't score extra damage against enemies slowed by time-slowing powers.
          • Chain Lightning (14 Skill Points, 16 Energy per second)
            • Lightning shoots from Storm's hands and chains from enemy to enemy.
            • 44-49 Electricity Damage per second on initial target.
            • 17-19 Electricity Damage per second on up to 6 additional targets.
            • Comment:
              • It does not appear that a single target can be hit by more than one chain.
              • Works like a rapid-tap attack power on all targets as they are continuously interrupted, which makes this one of the best rapid-tap ranged attack powers as it can simultaneously neutralize seven targets.
          • Conduction (12 Skill Points, 100 Energy, 80 seconds)
            • Team gets Electricity damage to melee attacks and +80% elemental resistance.
            • +17% Electricity Damage
          • Hail Storm (11 Skill Points, 33 Energy, 7 seconds)
            • Attaches a hail storm to an enemy that can damage nearby enemies for a time.
            • 54-60 Cold Damage per second on primary target.
            • 17-19 Cold Damage per second on targets near the primary target.
            • Comment:
              • Theoretically powerful if you are in tightly-packed melee and can set this up on different targets since they could then overlap their hail storms and damage could exceed 100 per second.
          • Lightning Strike (16 Skill Points, 24 Energy)
            • Casts lightning bolt down on enemy.
            • 139-154 Energy Damage.
            • Comment:
              • Bolt starts on top of target and strikes down. You can therefore use this power from behind cover.
          • Whirlwind (16 Skill Points, 17 Energy)
            • Creates a powerful wind vortex that lifts and throws objects and enemies about. Hold to increase radius and maintain power.
            • 58-64 Wind Damage per second.
            • Comment:
              • Similar to Thor's North Winds.
          • Whirlwind Armor (16 Skill Points, 100 Energy, 80 seconds)
            • Whirlwind that absorbs damage and damages enemies near her. Prematurely ends once it has absorbed its damage limit.
            • Absorb 80 damage.
            • 44-49 Wind Damage per second.
            • Comment:
              • If you can do without this power, you might want to skip it and take Whirlwind instead. You won't get the shielding effect, but Whirlwind renders melee enemies unable to attack you anyway.
              • On the other hand, like other damage aura powers, it will work while you are blocking, so you can potentially take down bosses by activating this power and blocking until the damage aura destroys them.
              • Bosses cannot be trapped and this power does no damage on bosses.
          • Thunder Struck (XTreme)
            • Radial lightning attack.
            • 68-75 Electricity Damage, x2 against slowed, stunned, and frozen enemies.

          Marvel Ultimate Alliance - Spider-Woman


          Marvel Ultimate Alliance (for PC) - Playable Characters - Spider-Woman

          This is one of our Marvel Ultimate Alliance walkthrough / cheats / mods posts. For an index of all Marvel Ultimate Alliance posts, click here.

          A list of all character notes: Black Panther, Blade, Captain America, Colossus, Daredevil, Deadpool, Doctor Strange, Elektra, Ghost Rider, The Human Torch, Iceman, Iron Man, Invisible Woman, Luke Cage, Moon Knight, Mr. Fantastic, Ms. Marvel, Nick Fury, Silver Surfer, Spider-Man, Spider-Woman, Storm, Thing, Thor, Wolverine
          • One of very few characters who can heal the party (Doctor Strange, Silver Surfer, Spider-Woman), and the only one who does not need to be unlocked. However, her power (Metabolic Aura) isn't available until level 14.
          • One of a few characters with a 300+ damage power (Venom Blast). Plus it's long-range, piercing (can shoot through several targets) and fires near-instantly.
          Powers: (at Skill Level 10)
          • Attract (16 Skill Points, 100 Energy, 80 seconds)
            • Uses a pheromone that will cause enemies near Spider-Woman to focus on her. Also gives her a 50% ongoing resistance to the last damage type that hit her.
            • Comment:
              • Possibly useful to get other team members out of trouble, or to have enemies constantly converge to be hit by Bio-Electric Surge.
          • Bio-Electric Surge (11 Skill Points, 33 Energy)
            • Releases a powerful radial blast causing energy damage and knockback.
            • 54-60 Energy damage, radius.
          • Ensnare (16 Skill Points, 28 Energy)
            • Throws out several incapacitating traps that for a time will deliver energy damage to the enemies caught in them.
            • 85-94 Energy Damage x 18 seconds (1530-1692), x5 traps
            • Comments:
              • Spreads traps on the ground -- not targeted, and there is no guarantee that a target right in front of you will be hit.
              • Does not work against large targets like the Super Soldiers in the Omega Base.
              • Target cannot attack or defend while they are stuck.
          • Metabolic Aura (12 Skill Points, 100 Energy, 50 seconds)
            • Surrounds Spider-Woman with a healing aura that will also heal allies that come into range.
            • Heals 2% Health per second.
          • Spider's Bite (8 Skill Points, 28 Energy)
            • Spawns several energy balls from both her feet and hands, causing energy damage.
            • 85-94 Energy damage per ball.
          • Spider's Blood (14 Skill Points, 26 Energy)
            • Throws a bouncing projectile that will cause energy damage and have a 50% chance to stun.
            • 82-90 Energy Damage, 50% chance of Stun (21 seconds).
          • Venom Blast (16 Skill Points, 24 Energy)
            • Shoots a bioelectric beam that will pierce multiple enemies if fully charged.
            • 139-154 Energy Damage, Chargeable (x2 damage and piercing)
          • Bio Web (Xtreme)
            • Weaves a bio-electric web that will break, causing heavy energy damage. Has a chance to turn enemies into allies for a time. Once the time expires, turned enemies are instantly killed.
            • 68-75 Energy damage.
            • 20% chance of turning enemy for 10 seconds.